I think we can say by now that this butterflied smoked chicken is a classic at SCF. We’ve made it time and time again, and it never fails to impress. A brined chicken, butterflied — or spatchcocked, as some like to call it — is nestled on the grill for an hour over some hot charcoal and a few wood chips. It’s a simple, set-it-and-forget-it recipe, and hardly a week goes by in the summer without us making it.
Here are a few how-to photos. (The above photo is courtesy of Tania Savayan at The Journal News The recipe follows.
Preparing a brine:
After the backbone has been removed, snip the chest bone, too: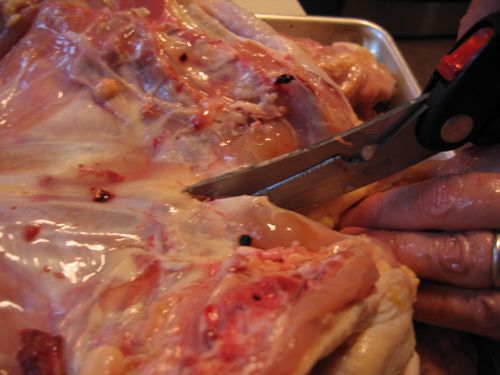
Prepare an indirect fire by placing coals on each side of the grill: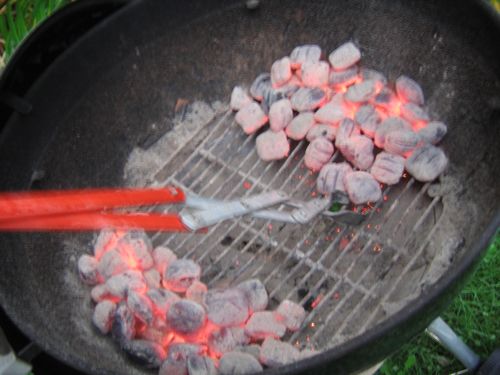
Place a piece of foil as a drip pan under the chickens: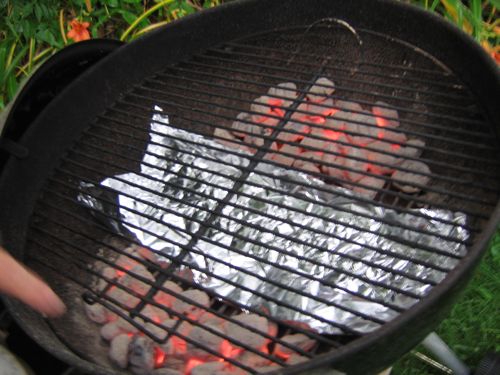
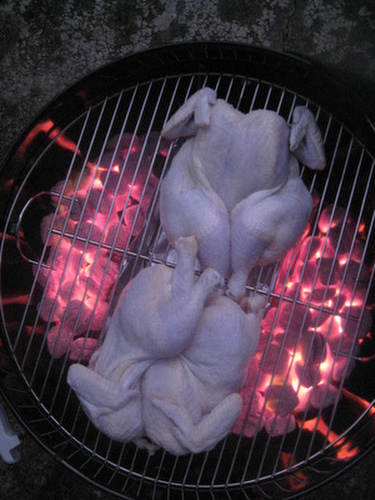
Nestle the chickens with their legs interlocking and the breasts toward the edge of the grill: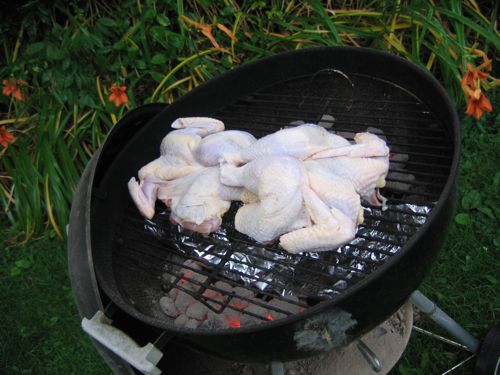
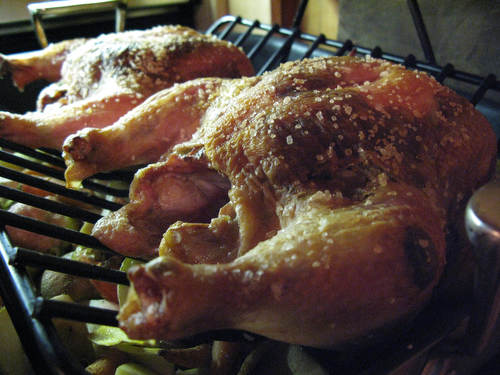
Cover the grill and wait one hour. They will be chestnut brown and lacquered: 
Butterflied Smoked Chicken
A Sour Cherry Farm classic. You start with brine, then butteryfly (or spatchcock, which is the technical term and oh-so much fun to say) the chicken by removing the backbone. Then cook over indirect heat for 1 hour. This is a great dish to do for a party because you really can “set it and forget it.” You don’t have to keep checking the grill and worrying the chickens — they’ll be fine on their own.
2 chickens, about 4 pounds each
4 quarts water
2/3 cups kosher salt
1/3 cup sugar
Herbs or other brine flavorants (optional)
A Weber (no relation) kettle
Regular Kingsford charcoal (Not Matchlight, for Christ sakes!)
Newspaper
Wood chips (hickory or pecan, not cherry or apple or mesquite)
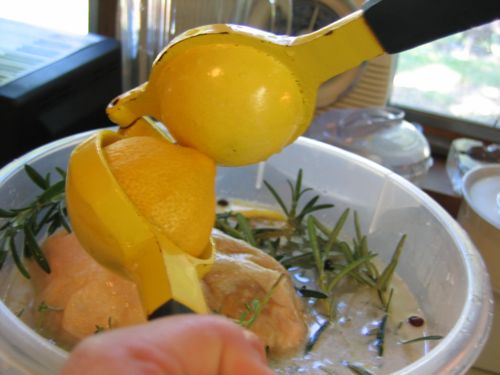
Whisk water, salt and sugar together in a large bucket or bowl. Add lime or lemon juice or whatever herbs from the garden that seem appropriate, like tarragon, rosemary, sage or thyme. Set aside.
Place one chicken breast side down on a cutting board and, using a poultry shears, cut lengthwise along one side of the backbone starting at the tail end and snipping your way to the neck end. Spin the chicken around while keeping the breast down. Cut along the other side of the backbone. Lift the backbone out and toss into a plastic bag and freeze for later use in making broth. With the backbone removed, the chicken will fall open part way but will not be as flat as you will want it on the grill. To help achieve flatness, locate the cartilage at the center of the breast from the neck end and snip through the first 1.5 inches. Press down lightly on the two sides of the chicken and it should flatten nicely on the cutting board. Slide the chicken into the brine. Repeat with the other chicken.
Brine the chickens for at least 1 hour and up to 2 or 3 hours. Brining for too long will give you inedibly salty chicken.
Remove the chicken from the brine. Let it air dry for up to 30 minutes.
Use a chimney starter to light your charcoal grill. Set the galvanized steel cylinder on the bottom rack of your grill, fill the top with charcoal and the bottom with a sheet or two (no more) of newspaper. When the newspaper is lit, it burns and lights the charcoal above. It will take 10 to 20 minutes for the coals to be ready. You should see orange flame deep inside the chimney starter, and gray ash just starting to form on the charcoal at the top. Carefully — wear heatproof gloves — dump out the coals on each side of the grill, leaving them middle empty. (Of course you won’t be perfect, so take a really long set of tongs, and move the rogue coals to their place.)
Shape a large piece of foil into a rectangle and make a border of about 1 inch around all sides. Fold that border up to form a makeshift tray. (It acts as a drip pan to catch the fat falling from the chickens.) Place the foil tray between the two sides of coals. Put the grate on top of that.
Then nestle your chickens onto the grate. Put the neck side to the outside, and let the legs sit on top of one another.
Add 5 or 6 wood chips – hickory or pecan, but not apple or mesquite. We just don’t prefer the taste.
Put the lid on, open the top vent, and wait. About 50 minutes to an hour. Don’t peek! You will know when your chickens are done when they look chestnut brown and the legs wiggle so easily they could come off the chicken without a knife.
Let the chickens rest for at least 10 minutes. They will stay warm for up to 45 minutes, and are delicious even at room temperature.
Serves 6 to 8.